Taking a photograph is just half the fun. Editing your photos can take them from great to amazing. One of the editing software out there is Photoshop and is hands down the best you could ever buy.
Here is how I chose to edit this photo from last Sunday wedding. I thought I would show you guys in case any of you would like to try the same thing:)

The picture I started out with is nice but nothing spectacular. What I did love about the photo was the gorgeous old wood of the barn. Since this photo has a vintage feel I decided that it would be cool to edit it in a Lomo style (even though the lomo effect did not start until the 80s.)

The first thing I did was to make his white shirt less bright. I went to the Layers menu and selected New Adjustment Layer>Brightness/Contrast. I took the brightness down as low as I thought it needed to be. Actually after a few more steps I decided to take the brightness down even lower, so don't worry if you need to change this level in the future as it is easy to do.
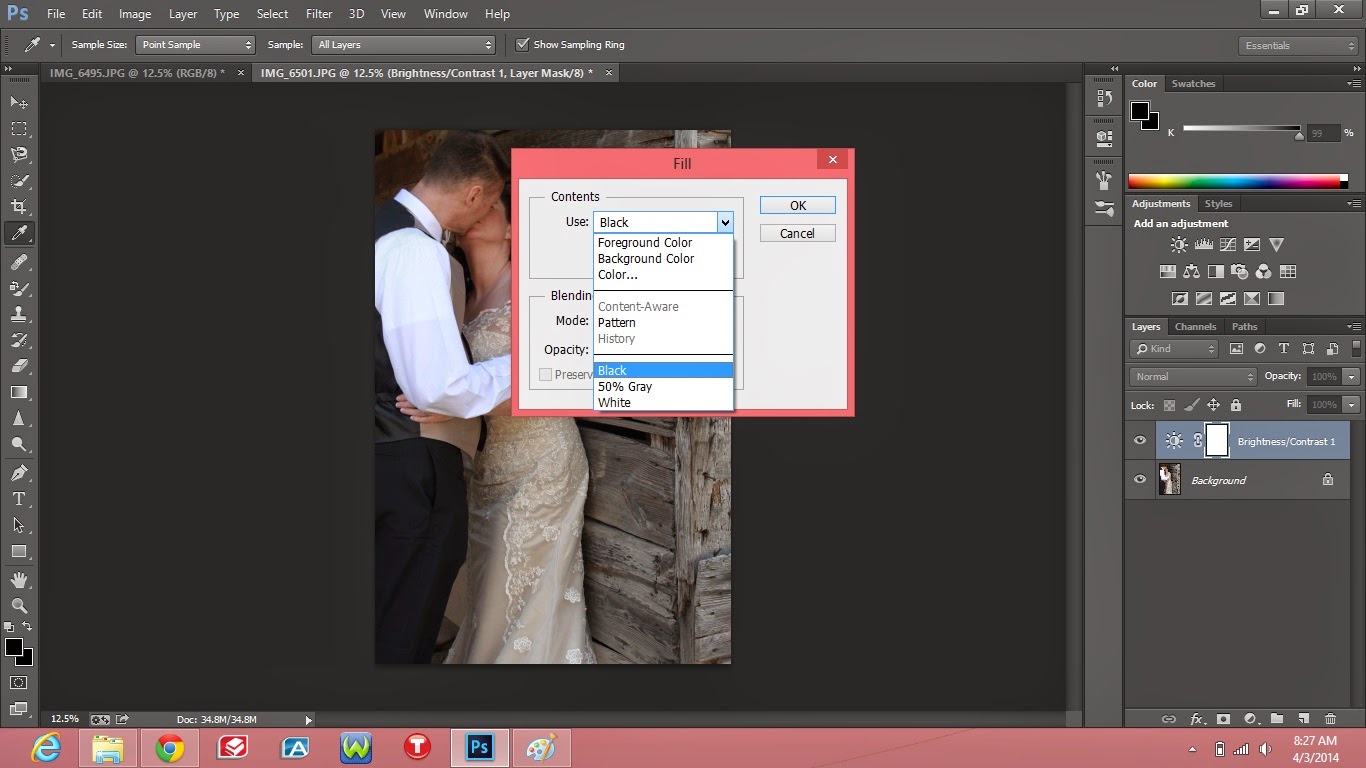
Next I clicked onto the Edit menu and clicked Fill. Then I proceeded to choose Black for the fill color. That Layer will then become invisible on the photo so to make it "reappear" you will need to use the paint brush with the color white.

As I'm hoping you can see in the photo as I paint over the white shirt, it becomes the shade of brightness that we chose before. This is great when part of your photo is too bright or too dark.
After finishing painting I noticed that the color of the shirt had turned a blue.

Because the shirt was the only thing with blue in it I just adjusted image hue by clicking Image>Adjustments>Hue/Saturation. I then turned the Blue Saturation completely down. If my image would have had blues in other objects then I would have needed to create a new layer and just adjust the blue on his sleeve.

The next step was to use the Lasso tool to circle around the photo. This will create a vignette. Before lassoing the photo make sure Feather has been set to at least 80 px. I then clicked Select>Inverse to select the outside of the Lasso.

I then added a Levels Layer and moved the center arrow to the right until I liked the look of it. For this picture it was .70. After doing this I merged the all the Layers together.

The next step was adding a Curves Layer and making a S shape with the curves. This is another time when you just adjust it as much as you'd like:)

I then made another Layer and used the paint bucket too to fill it with black. I then set the Opacity to 20% and merged the layers.

The final step was to add sharpness to the image by clicking Filter>Sharpen>Unsharpen Mask. I kept the amount at 50% but I brought the Radius to 10.0 Pixels.
And here is the finished product!

And here is the finished product!
No comments:
Post a Comment